


รายละเอียดสินค้า
| ข้อมูล |
น้ำหนัก
บาร์โค้ด
ลงสินค้า
อัพเดทล่าสุด
|
| รายละเอียดสินค้า |
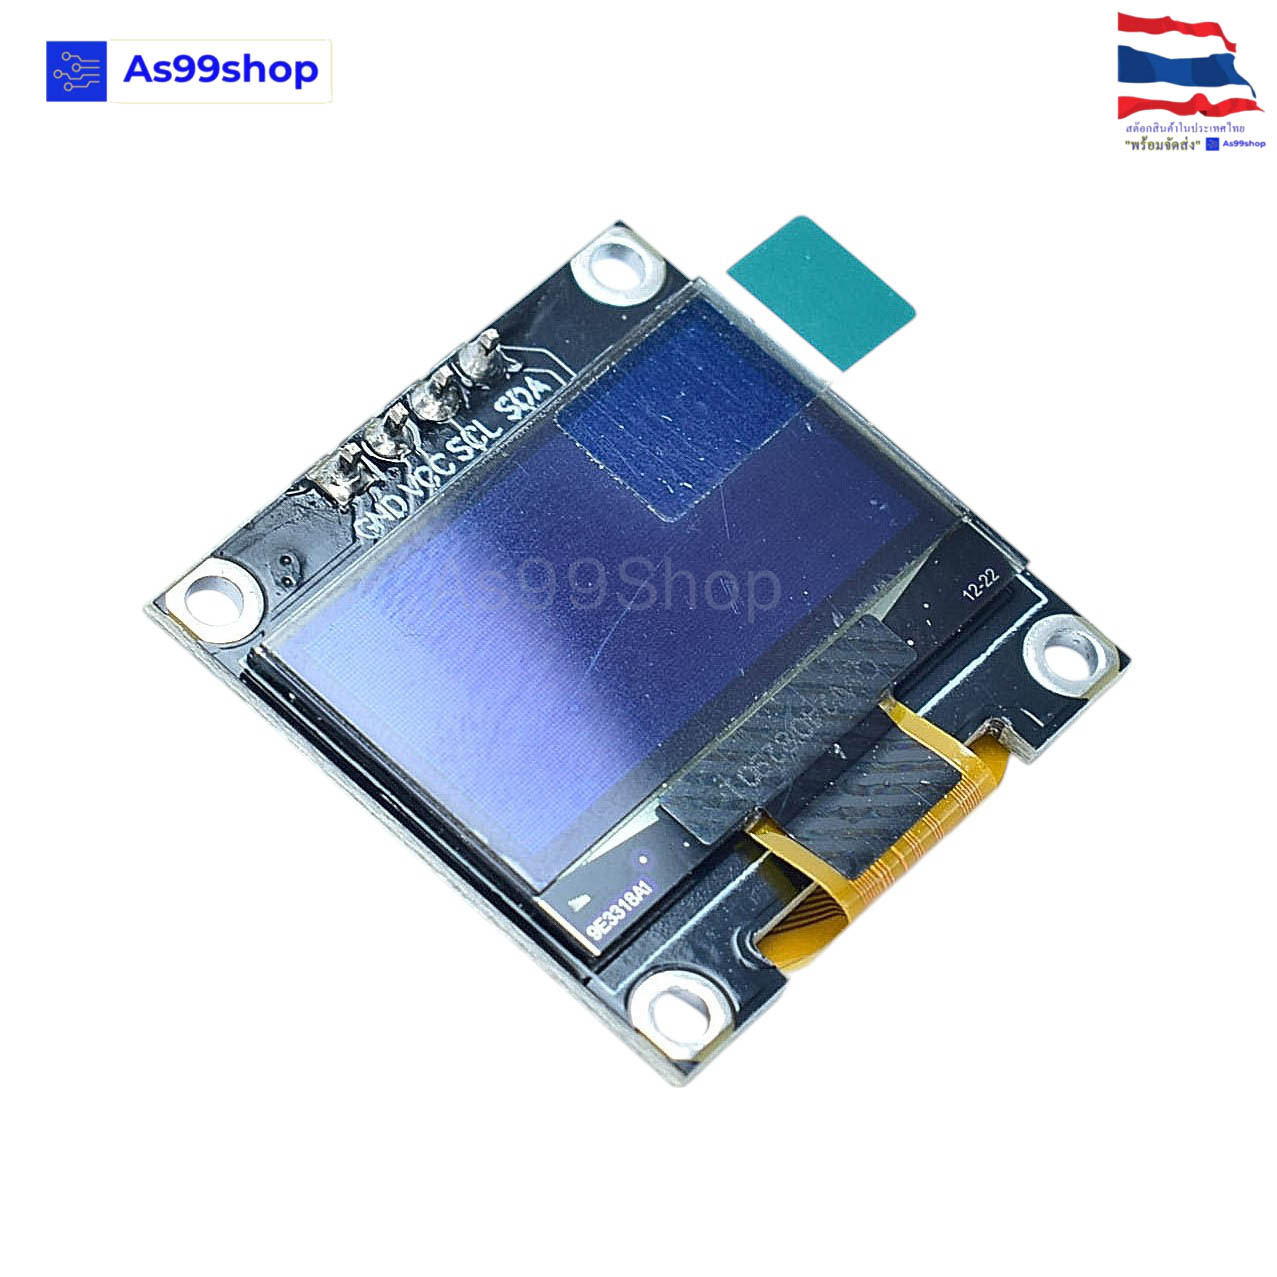
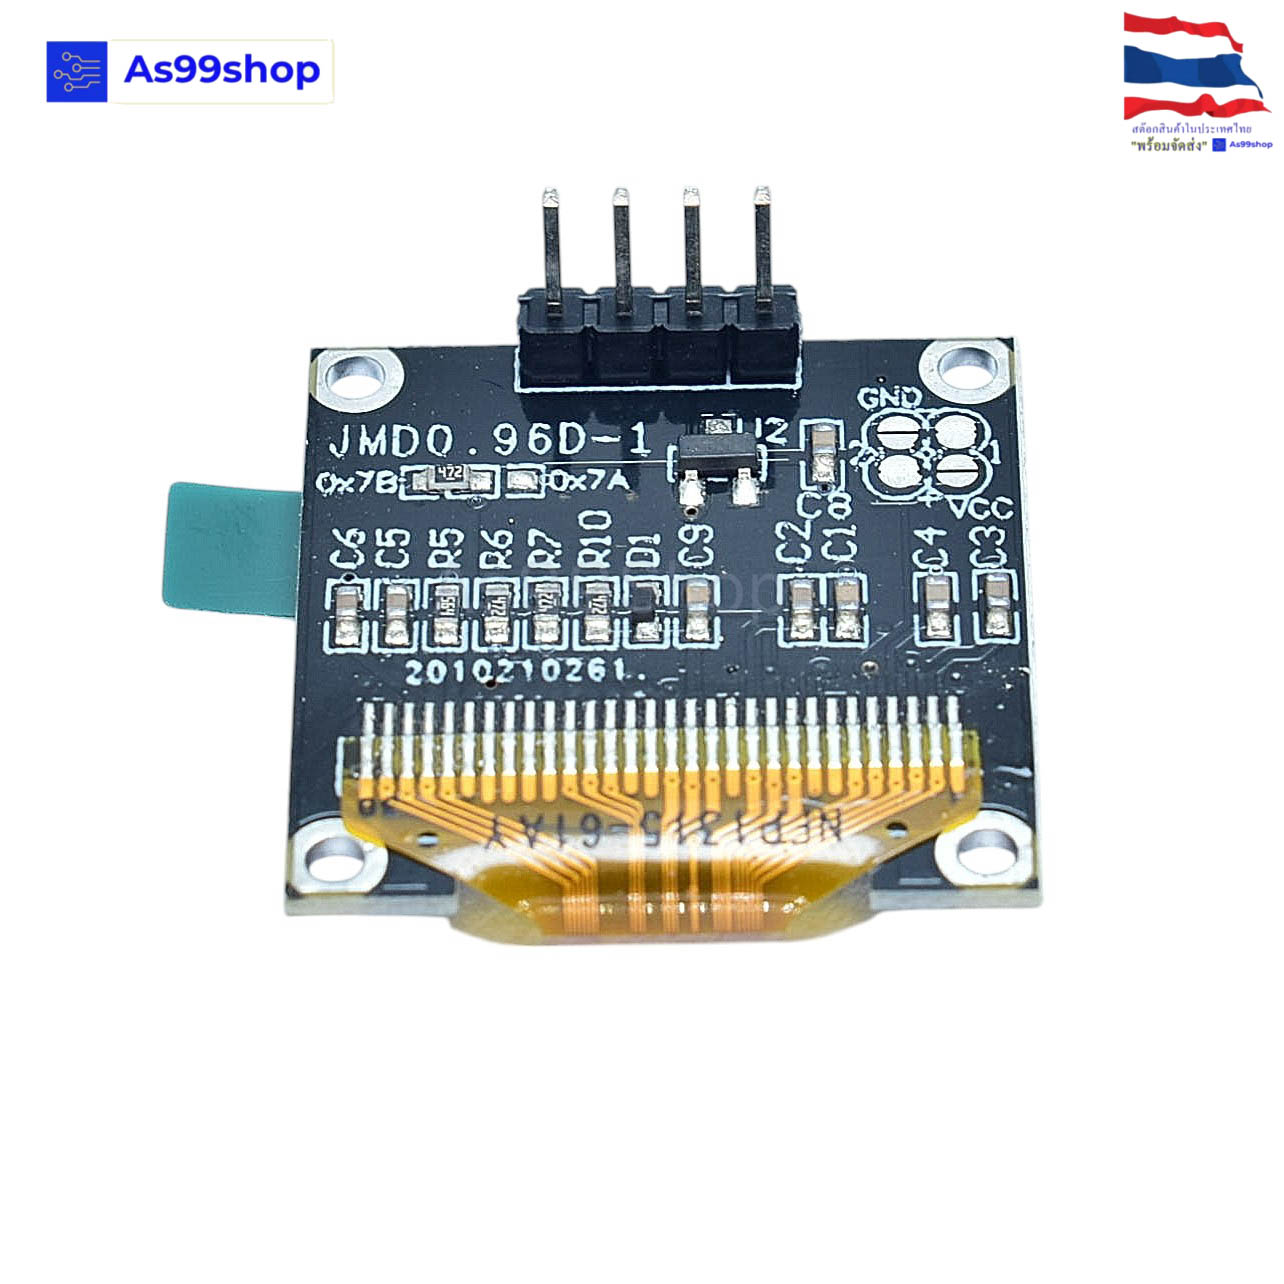
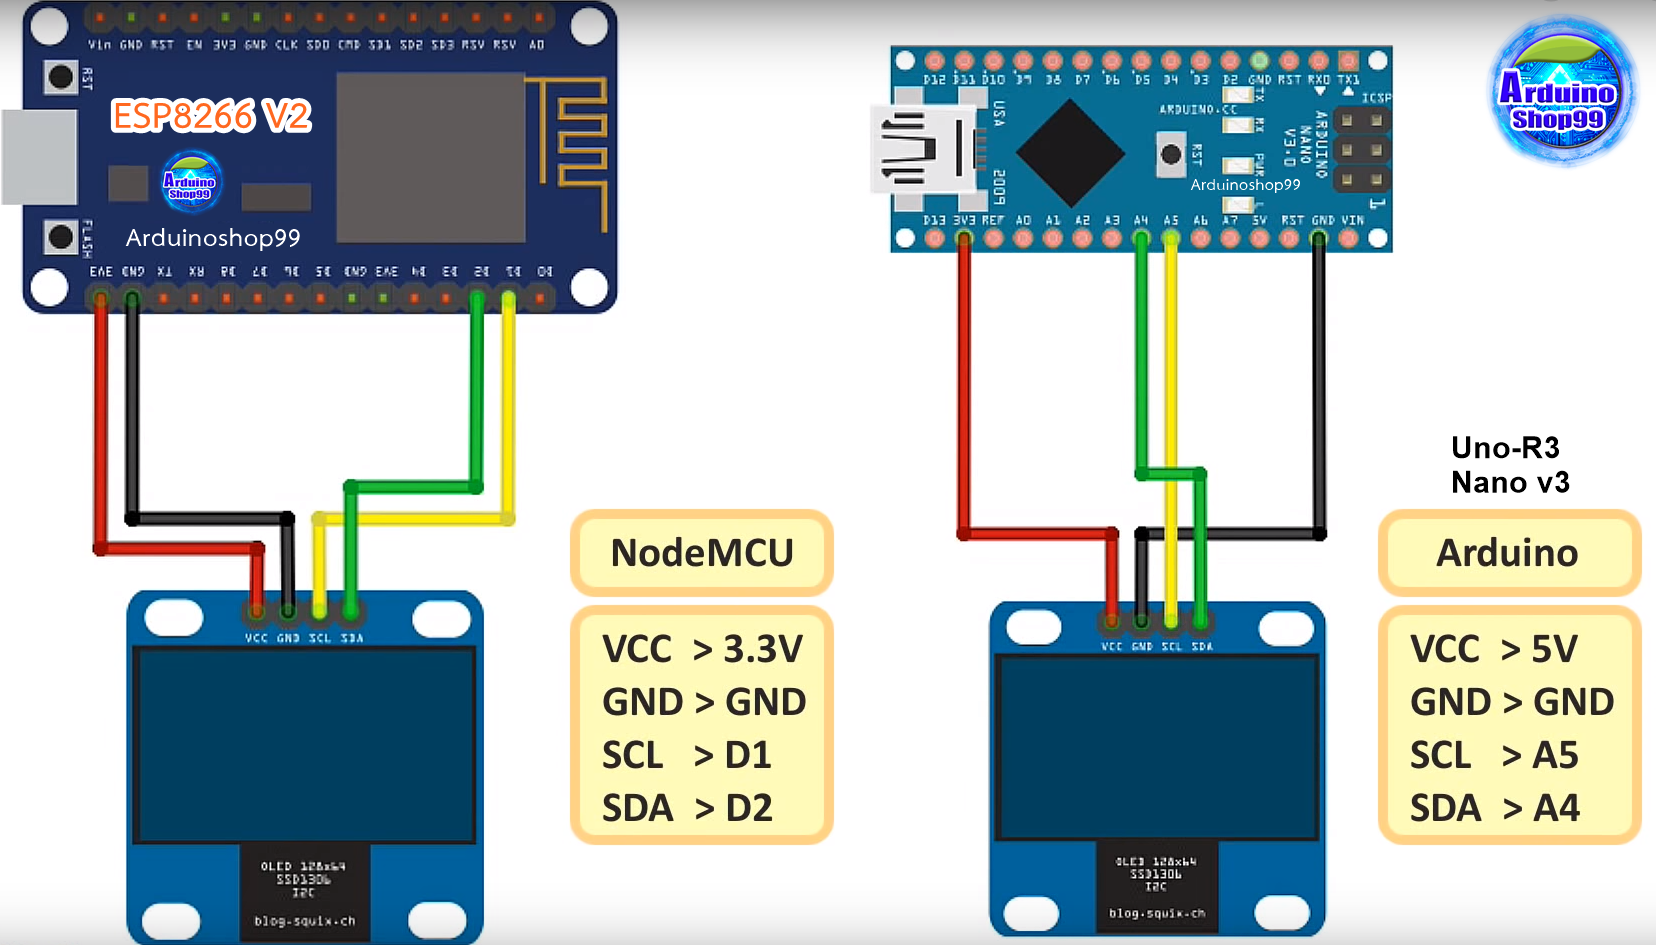
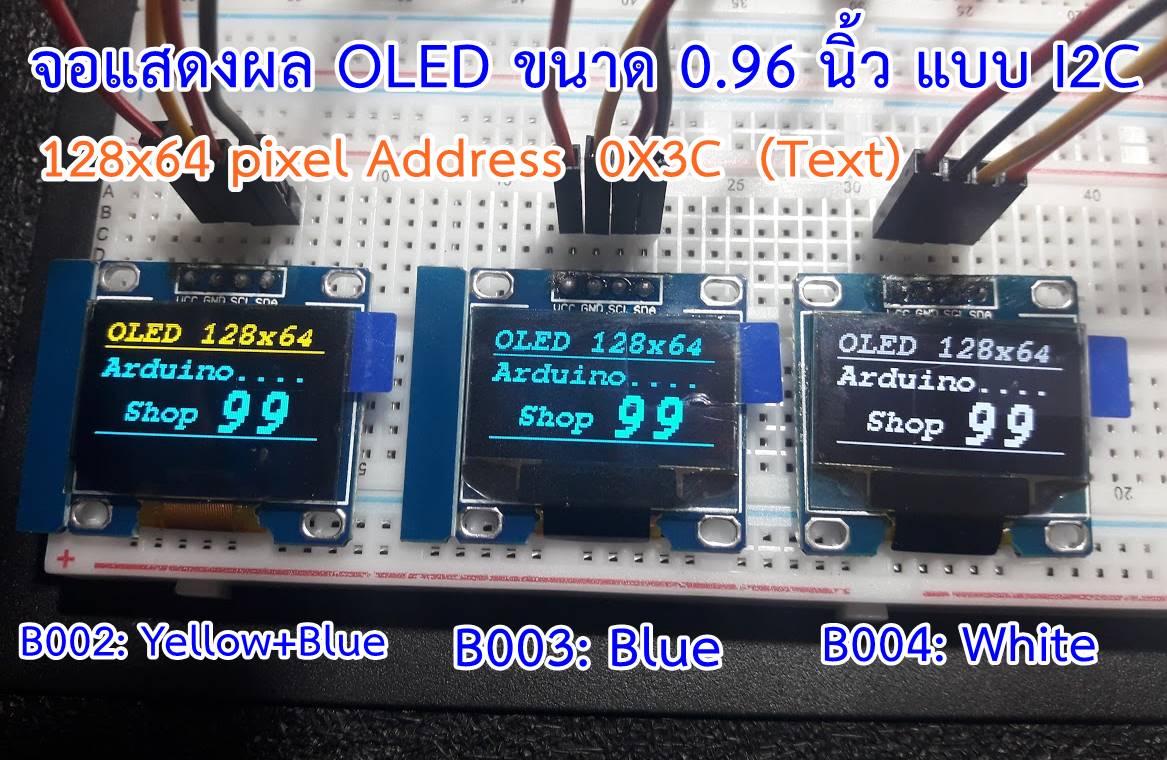
จอแสดงผล OLED ขนาด 0.96 นิ้ว แบบ I2C สีขาว ; OLED Display I2C Module 0.96 inch (128x64 pixel "White) 3.3-5Volt Driver SSD1306 รุ่นที่ใช้ทดสอบ Uno-R3,Nano v3 ,Esp8266 NodeMcu
**driver อาจมีการเปลี่ยนแปลง** specification :
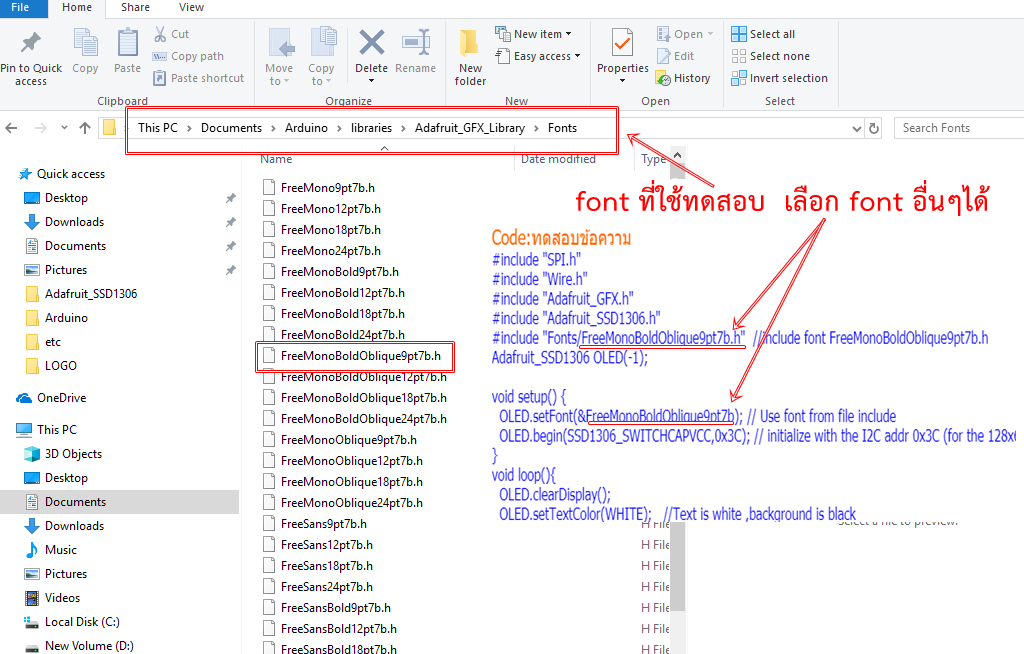
Code:ทดสอบข้อความ
/*
Arduino with Test OLED module white SSD1306 driver I2C
High resolution: 128×64 pixel
For complete project details, visit:Arduinoshop99
*/
#include "Wire.h"
#include "Adafruit_GFX.h"
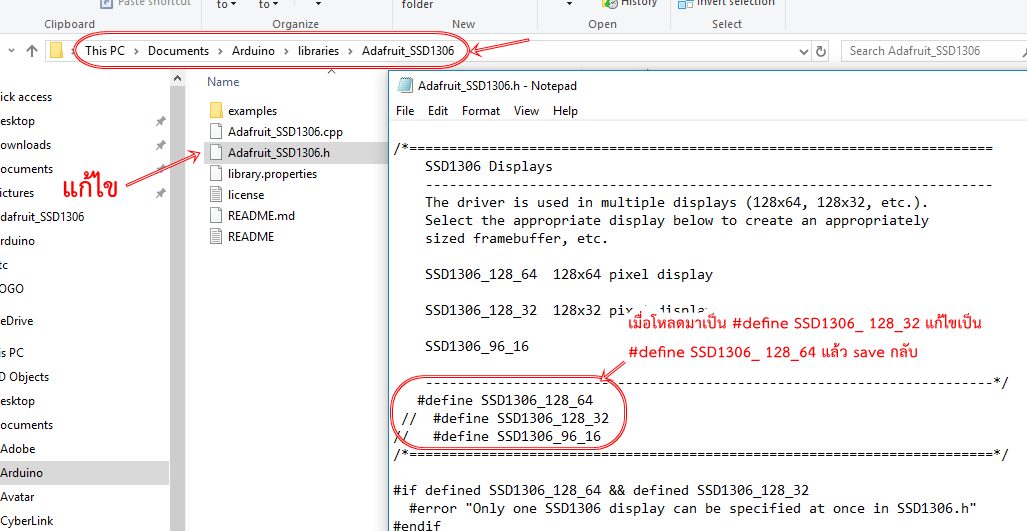
#include "Adafruit_SSD1306.h"
#include "Fonts/FreeMonoBoldOblique9pt7b.h" //include font FreeMonoBoldOblique9pt7b.h
Adafruit_SSD1306 OLED(-1);
void setup() { OLED.setFont(&FreeMonoBoldOblique9pt7b); // Use font from file include
OLED.begin(SSD1306_SWITCHCAPVCC,0x3C); // initialize with the I2C addr 0x3C (for the 128x64)
}
void loop(){
OLED.clearDisplay();
OLED.setTextColor(WHITE); //Text is white ,background is black
OLED.setTextSize(1);
OLED.setCursor(0,11);
OLED.println("OLED 128x64");
OLED.drawLine(0, 15, 127,15, WHITE);
OLED.setCursor(0,30);
OLED.println("Arduino....");
OLED.setCursor(15,55);
OLED.println("Shop");
OLED.setTextSize(2);
OLED.setCursor(0,59);
OLED.println(" 99");
OLED.drawLine(0, 63, 127,63, WHITE);
OLED.display(); //
delay(200);
}
ติดตั้ง library ก่อนใช้งาน
U8g2 library: https://github.com/SGBotic/U8g2_Arduino
    |
| เงื่อนไขอื่นๆ |
|
| Tags |
วิธีการชำระเงิน

ชำระเงินผ่านธนาคาร
ชำระเงินด้วยการ Scan QR


สนธยา ใจผ่อง
063-xxxxxx-8
Accept All Banks | รับเงินได้จากทุกธนาคาร


สินค้าในตะกร้า ({{total_num}} รายการ)

ขออภัย ขณะนี้ยังไม่มีสินค้าในตะกร้า
ราคาสินค้าทั้งหมด
฿ {{price_format(total_price)}}
- ฿ {{price_format(discount.price)}}
ราคาสินค้าทั้งหมด
{{total_quantity}} ชิ้น
฿ {{price_format(after_product_price)}}
ราคาไม่รวมค่าจัดส่ง
รวมภาษีมูลค่าเพิ่มแล้ว
➜ เลือกซื้อสินค้าเพิ่ม